Automate Dumb IR Remote Devices With Esphome!
I recently discovered ESPHome - a project to help anyone build smart home devices. It is 100% open source, has a declarative language that makes writing microcontroller firmware easy, over the air updates, and more. When I read the website, I initially thought it cannot possibly deliver on all these promises. I was wrong. This project is amazing and I use it to automate my media setup at home.
The Problem
Infrared sensors are used to control my radio receiver, TV, and TV receiver. Infrared technology presents a couple of problems. IR only works if there is line of sight between the transmitter and receiver. My TV's IR receiver is blocked when the center channel speaker from my home theater setup is placed in the optimal position. Moreover, I don't want to use multiple remotes, these remotes get lost, and these remotes cannot be automated via homeassistant.
Esphome to the rescue!
I planned to order an IR receiver that dumps raw pronto codes and record the code for each button on the remotes. Then, I can program a ESP32 to send out the same codes to an IR transmitter diode. The transmitter can be taped onto the IR receiver of the device I want to control. Esphome handles the integration with homeassistant so I can use it anywhere in my home and in my automations.
BOM
Here is the things I needed to order to make this work:
- Wemos D1 Mini (ESP8266) (Wemos)
- Digital 38khz Ir Receiver Sensor Module + 38khz Ir Transmitter Sensor Module https://www.amazon.ca/dp/B0C9TGJ99R?ref=ppx_yo2ov_dt_b_fed_asin_title
Aditionally, I 3D printed a case to protect the D1 Mini. The total cost of this project was 5 Canadian dollars for automating each device.
Getting the IR Codes
Writing firmware for the microcontroller using esphome requires writing a yaml configuration for the device. I flashed the following yaml file onto the D1 Mini microcontroller using the esphome addon in homeassistant:
# Board: Wemos D1 Mini (ESP8266) (Wemos)
# Definition: definitions/boards/d1_mini/manifest.yaml

esphome:
  name: tv-reciever
  friendly_name: TV Reciever

esp8266:
  board: d1_mini

logger:

api:
  encryption:
    key: "<REDACTED>"

ota:
  - platform: esphome
    encryption:

wifi:
  ssid: !secret wifi_ssid
  password: !secret wifi_password

remote_receiver:
  pin:
    number: GPIO4 # D4 on the microcontroller silk screen
    inverted: true
  dump: all
  tolerance: 25%
I wired up the IR receiver module and microcontroller using the following table:
| Pin on IR Receiver | Pin on Microcontroller |
| VCC | 5V |
| GND | GND |
| DAT | D4 |
When the device is powered on, I can view the device logs over the air via homeassistant. I pointed the remote to the IR receiver, pressed buttons, and recorded which log output corresponds to which button.
I got the following output when I pressed the power button on my receiver's remote.
[15:55:16.856][D][remote.beo4:085]: Beo4: n_sym=67
[15:55:16.856][I][remote.pronto:231]: Received Pronto: data=
[15:55:18.427][I][remote.pronto:239]: 0000 006D 0022 0000 00AF 0013 0018 0013 0043 0013 0043 0013 0043 0014 0042 0013 0043 0013 0043 0013 0018 0014 0042 0013 0018 0014 0017 0013 0018 0013 0018 0013 0018 0014 0018 0014 0042 0013 0018 0013 0043 0014 0018 0013 0043 0013
[15:55:18.427][I][remote.pronto:239]: 0018 0014 0042 0013 0018 0013 0018 0013 0043 0014 0018 0013 0043 0013 0018 0014 0042 0014 0018 0013 0043 0014 0042 0013 0181
[15:55:18.427][I][remote.pronto:231]: Received Pronto: data=
[15:55:18.427][I][remote.pronto:239]: 0000 006D 0002 0000 0157 0058 0014 0181
After recording all the pronto codes, I setup the IR transmitter.
Sending IR Codes
I wired up the IR transmitter module and microcontroller using the following table:
| Pin on IR transmitter | Pin on Microcontroller |
| VCC | 5V |
| GND | GND |
| DAT | D4 |
Using the codes pronto codes and button data from the previous step, I wrote an IR transmitter yaml file:
# Board: Wemos D1 Mini (ESP8266) (Wemos)
# Definition: definitions/boards/d1_mini/manifest.yaml

esphome:
  name: tv-ir-blaster
  friendly_name: TV IR Blaster

esp8266:
  board: d1_mini

logger:

api:
  encryption:
    key: "<REDACTED>"

ota:
  - platform: esphome
    encryption:

wifi:
  ssid: !secret wifi_ssid
  password: !secret wifi_password

remote_transmitter:
  pin:
    number: GPIO4
    inverted: true
  carrier_duty_percent: 50%

button:
  - platform: template
    name: Power Button
    on_press:
      then:
        - remote_transmitter.transmit_pronto:
            data: 0000 006D 0022 0000 015C 00AC 0017 0014 0017 0014 0017 003F 0016 0015 0016 0014 0017 0014 0017 0014 0017 0014 0017 0040 0016 003F 0017 0014 0018 003F 0017 0040 0016 003F 0017 003F 0018 003F 0017 0014 0017 0014 0017 0014 0017 003F 0017 0014 0017 0014 0018 0014 0017 0014 0017 003F 0017 003F 0017 003F 0017 0014 0017 003F 0017 003F 0017 003F 0017 003E 0017 0181 0000 006D 0002 0000 015B 0057 0016 0181
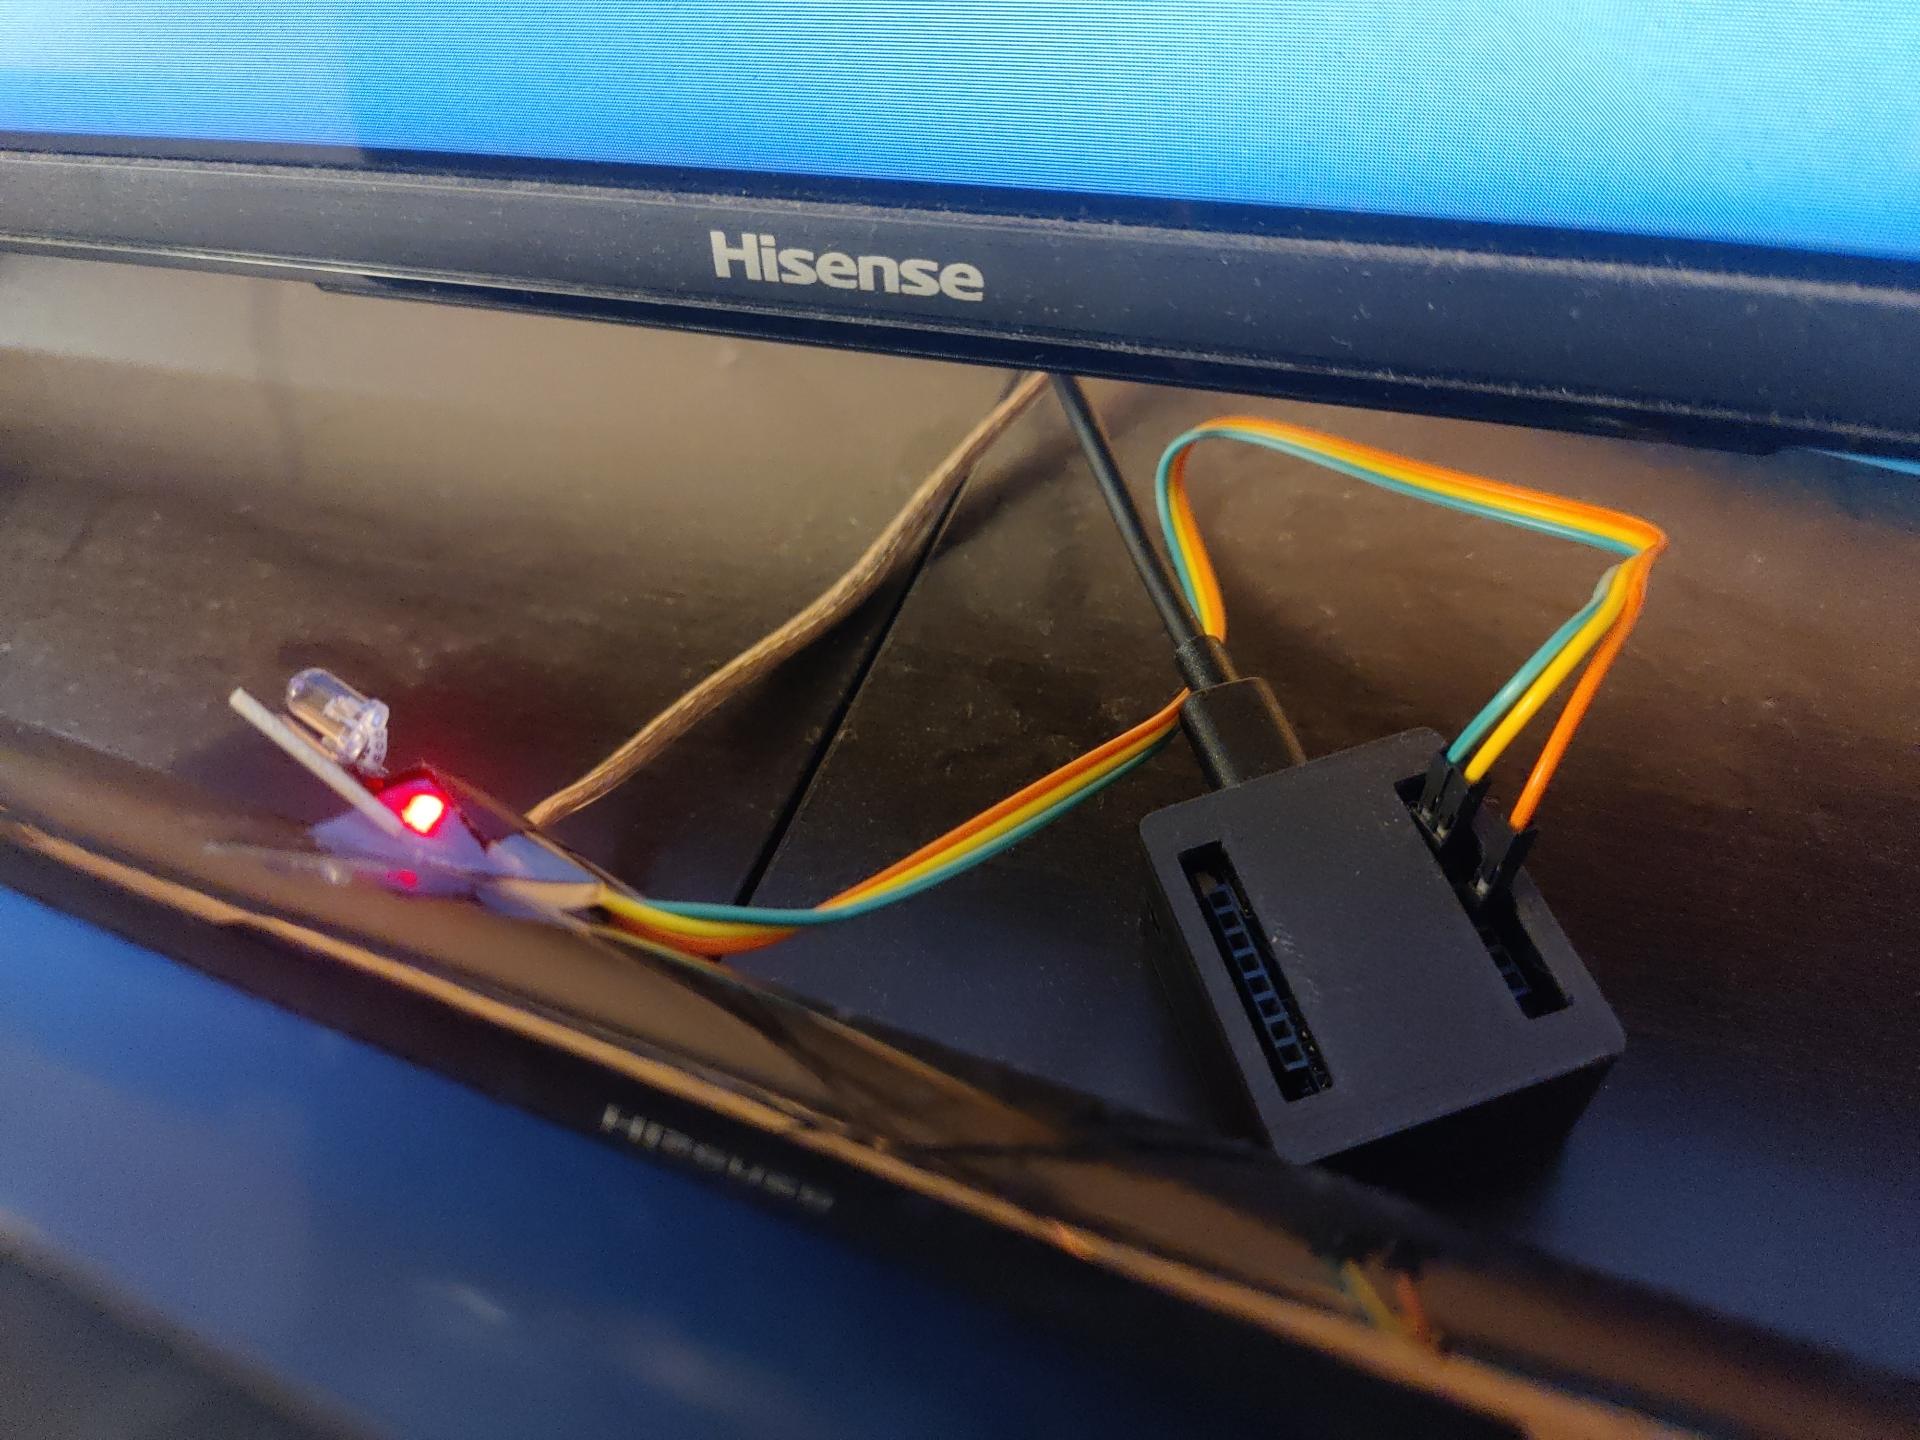
Im only showing the power button here for conciseness. Here is one of my ESP transmitters setup to my TV:
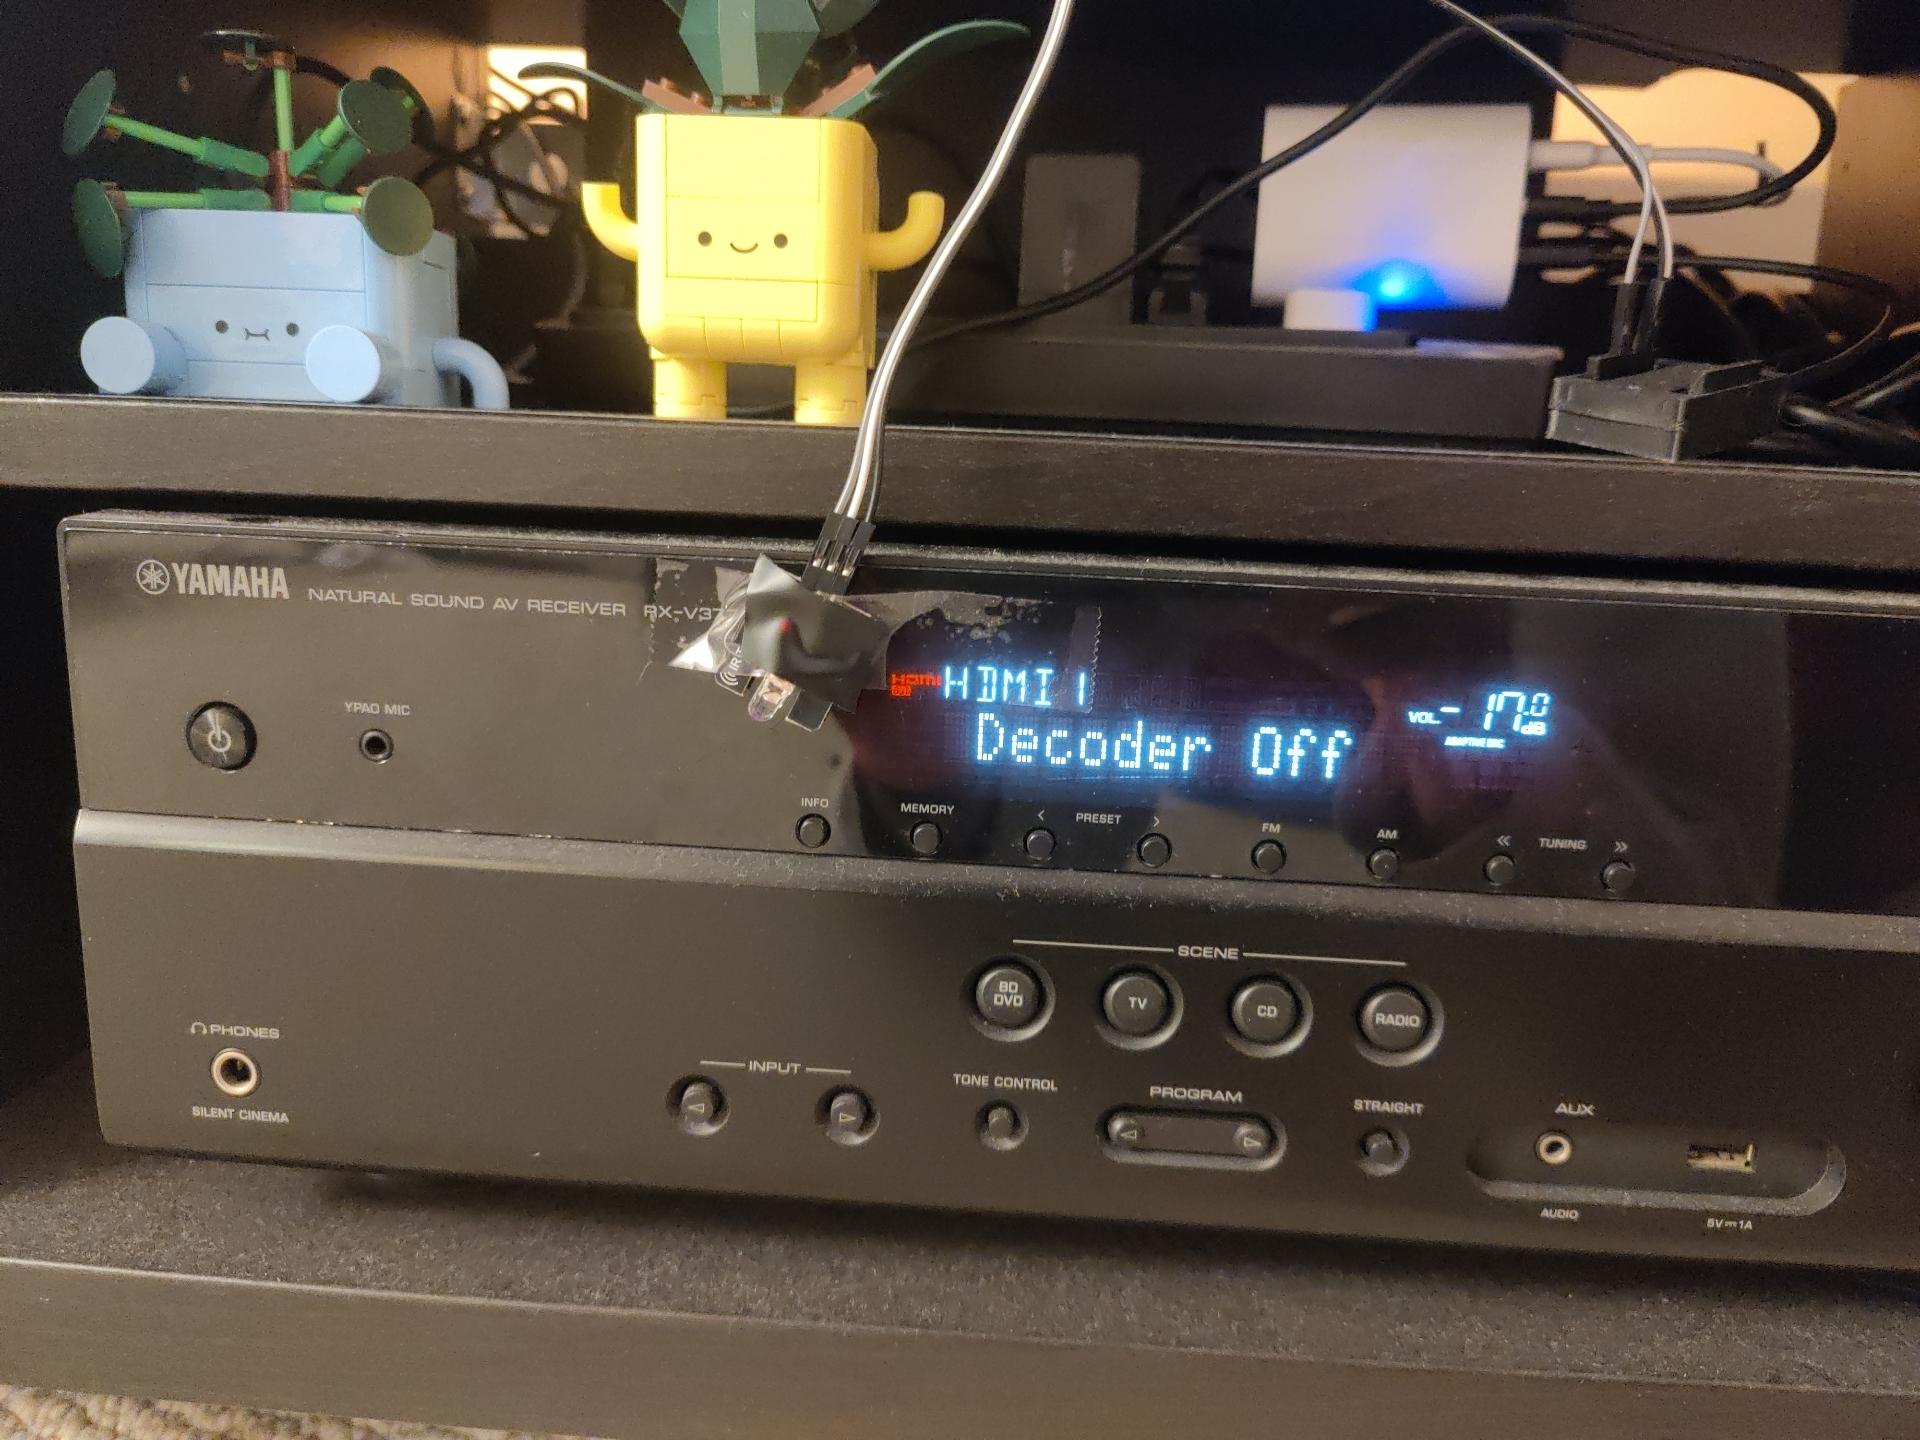
And setup to my TV receiver:
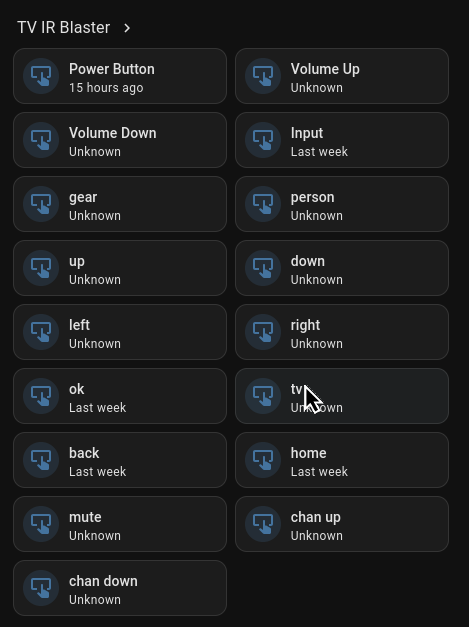
Now, all I had to do was adopt the devices in homeassistant. Here is how the TV IR blaster appears in homeassistant:
Conclusion
Before, I would need to use two remotes to turn on my TV (one for the receiver and one for the TV). Now, I press one button and it turns on the TV with all the correct settings. Moreover, I can control my radio receiver (connected to an espvoice) from anywhere in my home. Esphome is flexible, easy to use, inexpensive, and fun. I hope to do more projects with it in the future. Maybe I can build my own smartblinds since manufacturers charge a massive premium for zigbee/matter support.
Have a comment on one of my posts? Start a discussion in my public inbox by sending an email to ~anjan/public-inbox@lists.sr.ht [mailing list etiquette]